
Straw Bale Gardening? What the Heck is that? That was my reaction too… exactly.
Straw Bale Gardening is a quasi-new method of gardening. I say “quasi-new” because straw bale gardening has been around since the 1950s and maybe even earlier.
The book “Straw Bale Gardens” by Joel Karsten is bringing this unique gardening system into the mainstream. The first edition was copyrighted in 2013 and many revised editions have been published since that time.
Karsten is not just some “Hack” selling the newest “Shiny Bright Object”. Joel Karsten has a BS in Horticulture from the University of Minnesota. He has much more than just a basic understanding of gardening.
Joel travels around the world extolling the virtues of his gardening system. He helps people set up straw bale gardens.
Mr. Karsten also speaks to many groups educating them about straw bale gardening.
I have read two of his books, perused his “Straw Bale Gardens” website, and researched his pedigree. His ideas make sense to me and I am intrigued enough to attempt a project.
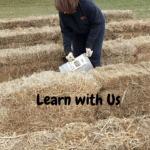
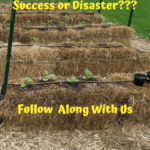
But, I am a NOVICE and this is an adventure or misadventure. I will document the successes and/or failures as the year goes along. You will also get a detailed cost-analysis of the project. It is going to be interesting!
So, what the Heck is it AND does it work?
What is Straw Bale Gardening?
Straw bale gardening is really container gardening and growing in thermophilic compost. The straw bale acts as both the container and the source of compost.
Not without help though. The bales have to be “conditioned” with a source of nitrogen (organic or inorganic) to start the composting process.
This is about a 12-day process with chemical fertilizers or about 15 days with organic fertilizers. So, basically a 2-week prep time before planting.
Chemical Fertilizers for Straw Bale Gardening
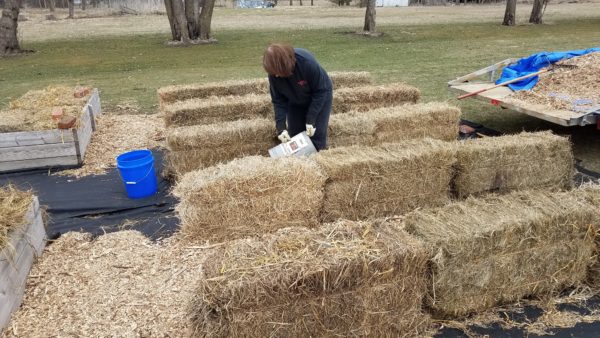
This is the proposed schedule for “conditioning” a straw bale with a chemical lawn fertilizer supplying the nitrogen:
- First Day: Apply 1/2 cup fertilizer and water the bale until saturated and the fertilizer is dissolved into the bale.
- Second Day: Water only until saturated.
- Third Day: Apply 1/2 cup fertilizer and water the bale until saturated and the fertilizer is dissolved into the bale.
- Fourth Day: Water only until saturated.
- Fifth Day: Apply 1/2 cup fertilizer and water the bale until saturated and the fertilizer is dissolved into the bale.
- Sixth Day: Water only until saturated.
- Seventh Day: Apply 1/4 cup fertilizer and water the bale until saturated and the fertilizer is dissolved into the bale.
- Eighth Day: Apply 1/4 cup fertilizer and water the bale until saturated and the fertilizer is dissolved into the bale.
- Ninth Day: Apply 1/4 cup fertilizer and water the bale until saturated and the fertilizer is dissolved into the bale.
- Tenth Day: Apply 1 cup of a balanced 10/10/10 (or similar) fertilizer to add Phosphorous and Potassium to the bale.
- Eleventh Day: Get your plants and seeds ready.
- Day 12: Your straw bale is ready to plant if the internal temperature is lower than 90 degrees F.
Chemical Fertilizer Notes
Your chemical fertilizer needs to be mostly nitrogen. Example NPK: (29-0-0, 30-0-3. etc.)
You don’t want weed and feed, crab-grass control, pre-emergents, or any pesticide added fertilizers.
Look for fertilizers with a minimum of 20 N and at least 80% of the Nitrogen being water-soluble.
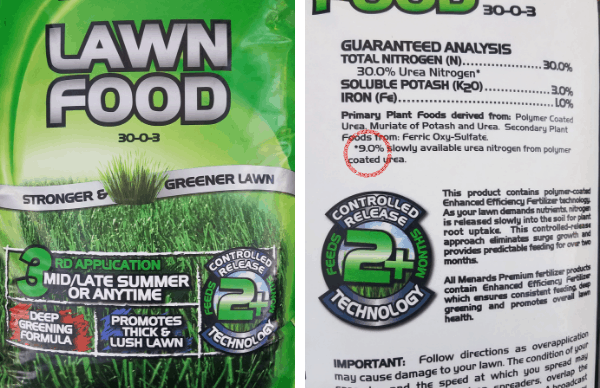
You don’t want slow-release fertilizers. Many bags are marked as slow-release but if you look at the Guaranteed Analysis label…it should say what percentage of Nitrogen is water-soluble.
The cheaper store brands are usually best. I am using Menard’s Premium Lawn Food and it is NPK 30-0-3. Only 9% is slow-release which means that 91% is water-soluble Nitrogen.
It has slow-release plastered all over the bag. Do yourself a favor and please…READ THE LABEL!
Organic Fertilizers for Straw Bale Gardening
The schedule for “conditioning” a straw bale with organic fertilizer:
- First Day: Apply 3 cups of N fertilizer and water the bale until saturated and the fertilizer is dissolved into the bale.
- Second Day: Water the straw bale until saturated.
- Third Day: Apply 3 cups of N fertilizer and water the bale until saturated and the fertilizer is dissolved into the bale.
- Fourth Day: Water the straw bale until saturated.
- Fifth Day: Apply 3 cups of N fertilizer and water the bale until saturated and the fertilizer is dissolved into the bale.
- Sixth Day: Water the straw bale until saturated.
- Seventh Day: Apply 1.5 cups of N fertilizer and water the bale until saturated and the fertilizer is dissolved.
- Eighth Day: Apply 1.5 cups of N fertilizer and water the bale until saturated and the fertilizer is dissolved.
- Ninth Day: Apply 1.5 cups of N fertilizer and water the bale until saturated and the fertilizer is dissolved.
- Tenth Day: Apply 3 cups of a Phosphorous and Potassium Fertilizer and water until dissolved in the bale.
- Eleventh to Fifteenth Day: Get your plants and seeds ready. Monitor the internal bale temperature until it comes down to 90 Degrees F. Less Nitrogen is used with organic fertilizers so the composting process is slightly slower.
Organic Fertilizer Notes
Blood meal is a good organic fertilizer for Nitrogen. Feather meal is also a good choice for Nitrogen. Bone meal or fish meal can be used for Phosphorous and wood ash is a good potassium source. Compost tea is also a really good source for jump-starting the composting process. You will need large amounts to begin the composting process and the cost is expensive in my area. Raw manure is NOT recommended for use as an organic Nitrogen source. There is always the danger of e-Coli contamination with the use of raw manures.
The Science Behind Straw Bale Conditioning
I am very familiar with the pre-composting process being employed with conditioning the straw bales. We use it every day in our worm composting business. Our feedstock of horse manure and vegetables is pre-composted to kill weed seeds and make the feedstock more organically stable. This reduces heating in our worm bins or wedge beds.
There is also another scientific reason for conditioning the bales. Composting the material through the first thermophilic heating cycle reduces the need for Nitrogen in the compost. This means that the ongoing composting process will not be stealing needed Nitrogen from your plants.
You will not be turning your straw bale as you would be with a compost bin to add another thermophilic cycle. Your straw bale will continue to compost in the mesophilic range at a much slower rate.
There really is good science behind the concept of straw bale gardening. This is probably what intrigues me the most about the method.
My Fertilizer Decision for the Straw Bale Garden
I am an ORGANIC GUY but I chose to use chemical fertilizer to condition my straw bales based on cost and ease of use.
I NEVER use chemical fertilizer, herbicides, or pesticides in our regular garden.
Here is my reasoning: I am using chemical Nitrogen to start a composting process in a straw bale (not in the ground).
The Nitrogen is being used up in the composting process. I intend to use worm castings and worm castings tea to provide nutrients to the plants in their growing cycle. There will be no herbicides or pesticides used in the straw bale garden.
This is a hybrid gardening operation and NOT strictly organic. It makes sense to me and the added cost of going completely organic was cost-prohibitive with little benefit.
However, our produce is used by us and not sold to other people. My decision would have been very different if we were selling organic produce.
It is a little bit like being a Vegetarian or a Vegan. You need to do what makes sense to you and makes you most comfortable.
If you NEED to be completely organic…by all means do so. It will work but it takes a little more time and costs more.
Ten Straw Bale Gardening Advantages
Weeding or Lack Thereof
Joel Karsten says that you should allow 30 seconds per bale per season for weeding. My project has 25 bales so…12.5 minutes of weeding per year. Say What! There IS a GOD!
I hate weeding. We mulch our garden but you always have that month to six weeks before the plants are big enough to really mulch well. It is the worst time of the year for me.
I hate weeding. I have better things to do like get a colonoscopy or wash my hair.
Did I mention I hate weeding? It is not therapeutic…it SUCKS! Weeding is number one on my list.
SBG = NO More Soil Diseases
You can’t get soil diseases when your plants do not contact the soil. We have great soil here in Iowa but over the years…the soil diseases accumulate. The claim is no soil diseases…we shall see.
Grow Anywhere
Poor soil, sand, clay, too dry, too wet, alkaline, acidic, contaminated, concrete (yup…concrete) it just doesn’t matter. You can place a straw bale nearly anywhere and grow something. Patio, rooftop, front yard, deck, just about anywhere that gets some sun. THAT is flexibility. You can even grow somewhere else next year…or not. The bales are supposed to last two years also.
Easy Height To Work
The straw bales are about 18 inches high which means a lot less bending over when harvesting and working.
If you are old and decrepit like me you can appreciate that. You can also make it wheelchair accessible for someone that can no longer garden otherwise. What a great gift that would be.
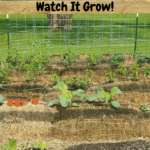
The straw bale garden can easily be used to grow many vegetables vertically saving space and easing harvesting.
Little or No Space for a Garden
Do you live in an urban setting? We touched on it above but a straw bale garden can be grown just about anywhere you have space for a bale. Almost everyone has that much space.
SBG = Lessened Pest Problems
The bugs get confused. Many come from the soil and won’t negotiate a straw bale climb.
You will still need to employ good organic pest control but the problems will be lessened.
Quick Early Plant Growth Extends Your Growing Season
You will be planting in a medium that is 85-90 F. This will supercharge your early plant growth.
You can even cover plants with a plastic film and create a greenhouse effect.
This allows you to plant much earlier than you can in the soil.
Your plants will grow and mature much more quickly.
SBG = Easy Watering
Your straw bales hold water well and can reduce the need for watering.
Drip hoses can be set up on a timer for virtually trouble-free watering.
Using drip hoses helps to reduce plant diseases that occur from wet leaves also.
Very Few Garden Tools Needed
You could just about throw away your garden tools. Your rototiller, hoe, shovels, etc.
You are going to need a hand trowel and a pair of pliers. A rake might be handy at times.
Everyone can garden like this.
SBG = Great Source of Compost for Other Uses
When your bales break down after a couple of years…what is left?
A pile of great compost that can be used in container gardening, regular gardening, landscapes, plantings, etc.
There are a million good uses for compost. You can even add it to your compost pile.
Compost is a great way to improve your soil and attract worms. Worms leave castings and aerate the soil for you.
Is Straw Bale Gardening For You?
You have just read about 10 straw bale gardening advantages. Do any of these resonate with you?
Myself, I hate weeding! The other nine advantages are pretty cool too.
I mentioned before that we are undertaking a straw bale gardening project this year.
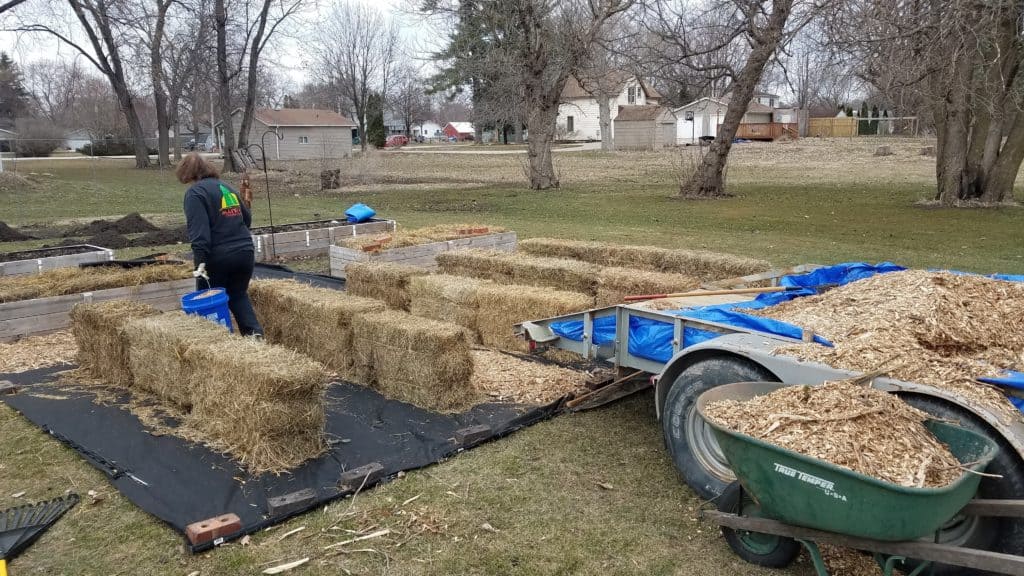
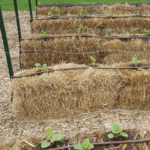
We have 25 straw bales set up and are just starting to condition the first ten bales.
It is a little early for the other 15 bales yet, but we will be starting to condition them in a couple of weeks.
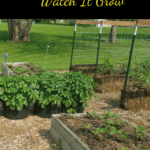
Our Straw Bale Gardening Project
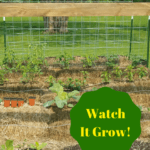
You can follow along with our straw bale gardening project that we are trying this year.
We will be following the advice of Joel Karsten in his book “Straw Bale Gardens”.
We will document the total costs and measure our results. There will also be some videos so that you can watch and follow along with us. You will see successes and you will see failures.
Check back for Part 2 where we will lay out our project and bring you up to date with our costs. We will also show you what is on our scheduled “to-do” lists.
We are happy to answer questions and reply to comments as we go along.
Ride along with us and see if straw bale gardening is right for you.
Will bags of peat moss work for this
Hi Kerry, I do not think so. You need either straw or grass bales. You need to get them composting. Rick