Compost tea supercharges your garden but it doesn’t stop there. Compost tea also adds beneficial bacteria and fungi to your soil. This is accomplished for a fraction of the price of compost or vermicompost. What’s not to love? We are going to take a deep-dive into compost tea and bring some light to the concept.
The Definition of Compost Tea
The “National Organic Standards Board” defines compost tea as:
A water extract of compost produced to transfer microbial biomass, fine particulate organic matter, and soluble chemical components into an aqueous phase, intending to increase or maintain the living, beneficial microorganisms of the compost.
Wow, that is a mouthful of gobbly-gook! Let’s break that down into language everyone can understand.
Compost tea is the extraction of microbes (already present in your compost) into a liquid. Some of these microbes will reproduce and increase in numbers. Others, such as fungi, will not reproduce but will grow larger in size. Nematodes do not do well in water and most will disappear in the brewing cycle. There will be an increase in numbers of amoebae, ciliates, flagellates, and other microbes.
The tea can be applied to your plants and soil and will increase the microbial life in your soil. Therefore, nutrients will become more available for plant uptake.
Seven Benefits of Compost Tea
So, why would you want to go to the time and trouble to make compost tea? Because there are benefits. There are a lot of benefits. Let’s take a look at a few.
Plant Growth:
Research has shown that plants receiving regular applications of compost tea grow better. Plant size and health improve visibly compared to untreated plants. The fruits are not always larger but overall plant size and health are better.
Disease Resistance:
Compost tea (especially worm casting tea) helps plants to resist many diseases. For instance, research has shown that tea can reduce damping-off, verticillium, and powdery mildew. Compost tea is NOT a cure-all but can certainly help in many cases.
Pest Suppression:
Healthy plants seem to resist pests better. Research conducted by Norman Arancon, Ph.D. The University of Hawaii, Hilo shows the suppression of parasitic plant nematodes and arthropod pests using vermicompost teas. Here again, worm casting tea is not a cure-all but has definitive benefits.
Improved Seed Germination:
Diluted vermicompost tea has been shown to improve seed germination appreciably. Soaking your seeds for 8-24 hours in a 1% dilution of worm tea increases germination rates over untreated seeds. Less seems to be more in this case.
Improves Soil Structure:
Regular applications of compost tea add bacteria and fungi to your soil. The tea helps to add to the fungal hyphae and create soil aggregates. The microbes add to the biomass and increase water-holding capacity.
Uses Less Compost and Saves Money:
You are able to use less compost while adding to the soil biomass. This saves money and time.
Easy To Apply:
Compost tea is easy to apply and can be done at any time. This makes the tea versatile. Also, you get quicker results versus compost.
Six Types of Compost Teas
Plant Teas:
Plant teas have been used for hundreds of years. Some organic farmers use their weeds to soak in water and create tea extracts. The idea is to cut weeds into small pieces and soak for a few days to a couple of weeks. The nutrients are leached out of the plant matter into the water. This nutrient charged water is then used as a fertilizer for their garden plants.
Some common weeds used for plant teas are dandelions, nettles, comfrey, chicory, willow, alfalfa, and horse-tail. Each particular weed is a good source of different vitamins and minerals. For instance, comfrey is rich in several vitamins, phosphorous, potassium, and trace minerals. Green lawn clippings can also be used to make a plant tea.
Plant teas are a good way to use those pesky weeds to nurture your plants. Moreover, little equipment is needed beyond an empty 5-gallon bucket. We all have one of those.
Manure Teas:
Manure teas have also been in use for hundreds of years. In fact, manure tea is likely one of the first extract teas to be used in agriculture.
Manure tea is made by soaking the manure in water and extracting the nutrients. The resulting liquid is then applied to plants as a nutrient-rich fertilizer.
You can use any Herbivore manure that you have access to. For example, some popular choices are horse, cow, pig, chicken, rabbit, or goat manure. Carnivore manures should be avoided because they may have high amounts of e Coli or Salmonella bacteria. For instance, human, dog, or cat manures should be avoided.
A Note of Caution: Anytime raw manures (even Herbivore) are used for tea extracts, there exists a chance of e Coli or Salmonella contamination. It is highly recommended to pre-compost manure to a temperature of at least 140 degrees for three days before using for manure tea. The high temperatures should kill off any harmful bacteria.
Vermicompost or vermicast is technically manure (worm) but is processed in the worm gut and really falls into a different category.
Manure tea is another simple option because it requires no specialized equipment to make.
Nutrient Teas:
Nutrients teas are made by adding organic nutrients to the water. The nutrients can be direct fertilizer for your plants or nutrients intended to feed the microbes in your soil. Usually, a combination of both. There is a myriad of choices to pick from for nutrient tea. Some sample ingredients that might be included: kelp meal, bat guano, fish hydrolysate, blackstrap molasses, alfalfa meal, humic acid, peat moss, seaweed extract, azomite, greensand, etc. The possibilities are nearly endless. In fact, you will see that organic nutrients are part of many compost tea recipes.
Commercially-Made Compost Tea:
These are the teas that you can purchase online or at your garden centers. Commercial producers make the tea and induce it into a dormant phase. They bottle it and sell it to their customers. Generally, bacterial diversity is seriously lacking and results are poor. You don’t have to try very hard to create a better compost tea at home. Obviously, I am not a fan of commercial teas.
Compost Tea – Thermophilic:
Thermophilic compost (hot compost) is nitrogen and carbon materials that have been piled, moistened, and aerated through several heat-cycles. The finished compost has a carbon/nitrogen ratio of about 10:1.
The finished Thermophilic compost is a good candidate to make compost tea. The tea can be made as an extract (steeped) or an actively-aerated brew. Both methods are suitable and have their pros and cons. We will discuss this later in the article.
Tea made with thermophilic compost tends to have less bacterial diversity because the heat-cycles kill off some of the microorganisms. However, effective tea can certainly be produced using this material.
Vermicompost:
Vermicompost, vermicast, worm castings are all the same thing by different names. This is definitely the gold-standard material for making great compost tea. Worm castings are very simply; worm poop.
Composting worms are kept in a carbon bedding material and fed different inputs. These inputs may include herbivore manure, vegetable scraps, fruit pulp, and other nitrogen sources. The quality of the castings is determined by the diversity of feed inputs.
Premium worm castings have a diverse bacterial and fungal profile. This diversity makes castings the go-to source for some great compost tea.
Here again, the tea can be produced as an extract or as an actively-aerated brew.
Leachate:
A few words about leachate. Leachate is the liquid that collects at the bottom of worms bins. Some worm bin systems have a spigot to drain this liquid off. Leachate is NOT compost tea!
Leachate sits at the bottom of the bin in an unoxygenated environment. This environment is a prime breeding ground for anaerobic bacteria and pathogens. You do not want this in your gardens! It can contaminate your vegetables and fruit with e Coli, salmonella, or worse.
Leachate does have some nutritive value but if you HAVE to use it…put it on inedible plants. Trees (not fruit), landscaping, or flowers that are not close to any food garden.
Compost Tea Brewing
There are two primary ways to make compost tea. The extract method and the actively-aerated process. Both methods are effective and have their plusses and minuses.
Compost Tea Extract:
The extract method is simply steeping your medium in dechlorinated water for a period of time. The time varies but is usually at least 48 hours and up to two weeks. The steeping process extracts the microbes from the compost material and transfers it to the water.
This method is very easy and only requires a container and your ability to stir the contents occasionally. Stirring adds oxygen to your brew which feeds the microbes.
Care needs to be taken to not allow the bacteria to use up all of the oxygen. If this happens, anaerobic bacteria may take over your extract. You will know if this happens. The extract will smell really bad. The extract should not be used in a food garden in this case. Apply it to trees or landscaping instead.
However, no expensive equipment is needed to make compost tea extract. Little to no expertise is required. An effective tea can certainly be produced this way.
Some drawbacks of this process are that your sheer numbers of microbes will be less than with an aerated brew.
Also, a good extract will generally take more time to produce than the aerated counterpart.
The Youtube video below shows making compost tea by the extraction process.
Actively-Aerated Compost Tea:
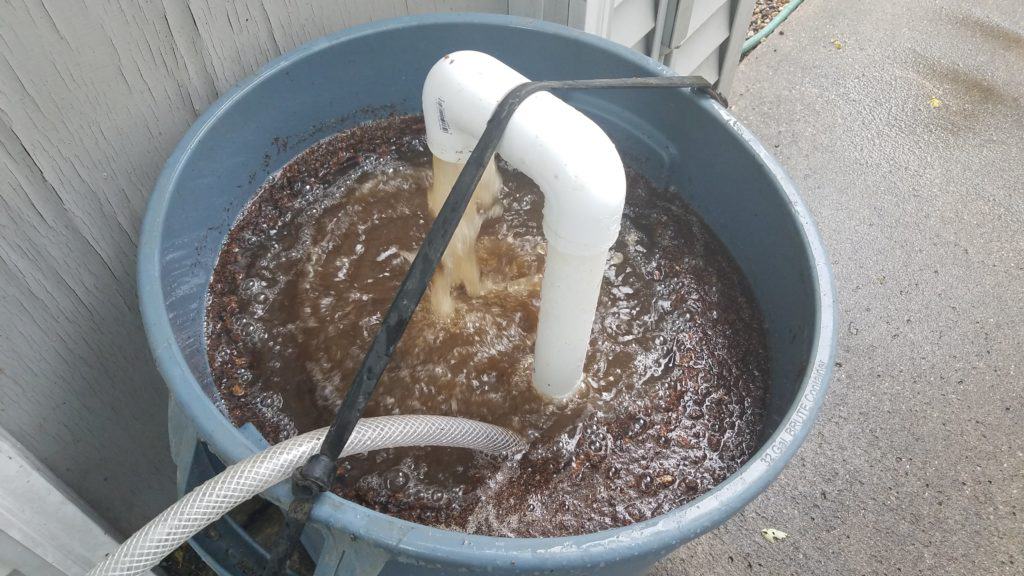
Actively-aerated compost tea is just what it says. An air pump is used to push oxygen through a brewer assembly into the water (actively-aerating). This raises the dissolved oxygen (DO) level of the water and feeds the aerobic bacteria and fungi.
We are encouraging the aerobic bacteria to out-compete any anaerobic bacteria (pathogens). The aeration allows for greater aerobic bacterial reproduction. This, in turn, creates greater biomass of beneficial microbes in our tea. This is our primary goal.
Brewing actively-aerated compost tea is not overly complicated. At least, the brewing process is not complicated. However, the science behind it is very complex. Suffice it to say, much research has been done on the subject. But, much more research is required before we fully understand the process and benefits.
The inputs and recipes for actively-aerated compost tea compared to extract brews are similar. The main difference (between the two types of tea) is the equipment needed to make an aerated brew. An air pump and a brewer assembly are required for aerated brewing. Also, a proper brewing vessel is needed just like the extract tea requires. This adds additional cost and commitment.
Should I Spend the Money?
So, is the additional cost worthwhile? We think so. We have been brewing aerated worm teas for years and like our results. Good air pumps can be purchased for about $70.00. DIY brewers can be made for around $30.00. Both will last for years. This was affordable for us but you will have to decide if it is right for you.
Obviously, you can certainly spend more on a purchased brewer. However, a DIY version works just as well and is cheaper. Airlift brewers are easy to make at home and make great tea. Also, you probably already have the tools you need to make one. You just need some PVC pipe, a few fittings, and a saw. We will look at some examples later on. Read on and decide.
We made a Youtube video showing the process of making actively-aerated compost tea. We go over the equipment needed and even provide a simple worm tea recipe. It will introduce you to brewing actively-aerated worm tea.
Compost Tea Brewing Equipment
Three pieces of equipment are needed to brew compost tea. A container, an air pump, and some type of brewer assembly. You will need to decide on your batch size upfront because air pumps and brewers need to be sized accordingly. For instance, a 5-gallon batch requires a differently sized air pump and brewer than a 50-gallon batch.
Our advice is to go a little bit larger than you think you need. Excess tea is a much easier problem to solve than not having enough. Larger batches can also reduce the number of times you need to brew. This can save time and money. Also, the cost is not that much more for slightly larger systems. Larger air pumps and brewers are a very good value compared to smaller ones.
Our Example
Let me give you our example and explain the reasoning and progression. We started brewing worm tea in 5-gallon batches with a small air pump and air stones. It was quickly determined that 5-gallons of compost tea was not enough to apply everywhere it was needed.
Quickly, we moved up to 25-gallon batches. This required the purchase of a commercial air pump, container, and brewer assembly. The cost was about $100.00 which we felt was reasonable. This size has worked okay for a while. The larger batch size has helped but is still insufficient.
Our next plan is to start brewing tea in 50-gallon batches. However, all is not lost. Our current air pump is large enough to brew 50-gallons of tea. We just need a new container and brewer.
We just purchased a clean, used, plastic food-grade, 55-gallon barrel for $15.00. Also, we have purchased the materials to make a new 50-gallon DIY airlift brewer. The cost…$33.00. So, for about 50 bucks, we can upgrade to double our current size of brews.
This seems like a reasonable, cost-effective solution for us. Should we have started making 25-gallon batches at first? Definitely. Should we have started making tea in 50-gallon batches first? Maybe. Learn from us.
What Size Brewing System is Right For You?
Well, that depends. Ask yourself these questions:
- What am I going to apply worm casting tea on?
- How am I going to apply the compost tea?
- Will the tea be applied full-strength or diluted?
- Can I use all of this tea within 24 hours?
These are all important questions. Everyone’s situation is different. For example, if you live in an apartment with a few houseplants, 5-gallon batches are plenty. You will be giving some compost tea to your neighbors.
Our example: The tea is brewed in 25-gallon batches.
We have a 50-foot x 50-foot vegetable garden. Our house is 30 x 45. There is landscaping all around the house. Also, we have various flower beds and an asparagus patch. The tea is applied with a hose-end sprayer that dilutes the compost tea. The dilution is 8 ounces of tea to a gallon of water. Ten gallons of tea applied this way will treat everything. The results are good and we are happy.
We also have a 1-acre lawn. We dilute the worm tea at a 3 to 1 ratio and apply it to the lawn. The remaining fifteen gallons barely does the job. We would prefer to reduce the dilution and apply the tea nearly full-strength. This is the reason we are upgrading to fifty-gallon batches.
Where Do You Fit?
These are two examples that could not be more different. Which example describes your situation? Extrapolate this information to your circumstances. Do you fall in-between somewhere? More? Less? You decide and plan accordingly.
The best advice is to err on the side of larger rather than smaller. There is always a tree that will appreciate some extra compost tea.
Tea Brewing Containers
Now, that you have determined the size of batches that you want to make, it is time to choose a container. Your container can be virtually anything that is large enough and holds water. You may even have something lying around you can use.
Some words of caution here though: If your container is plastic, make sure it is food-grade. We don’t want harmful chemicals leaching out into our compost tea. This includes knowing the history of the container. Is a food-grade bucket (that some painter used for paint thinner) still food-grade? I think NOT! Be very careful with used containers and know their history.
There is an enormous volume of suitable containers for brewing worm tea. This can include five-gallon buckets, plastic garbage cans, fifty-five-gallon drums, and up to 330-gallon IBC totes. The possibilities are endless. Pick one the right size, that is food-grade, and has a history that doesn’t include chemicals.
Compost Tea Brewers
Oh Boy! You have choices. There are lots of tea brewers on the market. Read the sales literature and everyone’s is the BEST! How do you choose? The good news; most of them will make great tea albeit for some of your pocket money.
Remember your goal. The idea is to make great tea that benefits your plants and soil. There are a variety of ways to accomplish this. You can purchase a system that comes with a container and an air pump. An individual brewer can be purchased. You can make an effective DIY brewer even if you are only semi-handy. The sky is the limit.
A decision needs to be made here though. In fact, the particular brewer you use is going to determine the air pump size needed. We always recommend following the manufacturer’s recommendation for air pump sizing. They have done the testing and know what works best with their brewer.
Airlift Brewers
We like and use airlift brewers. These are available for purchase from several companies. We make our own airlift brewers based on Mr. Tim J. Wilson’s design at Microbe Organics. The airlift brewers make great tea. We know that because Tim has done the research to back that up. And, our garden also agrees. Airlift brewers are easy and cheap to make. The brewers consist of some PVC pipe. a few fittings, and an air hose that connects to an air pump. They are also easy to clean which is VERY important. In fact, if you can use a hacksaw, you can make this brewer.
Also, we would be more than happy to help you out with any particular sizing for your project. We have made several in sizes up to fifty gallons. Just leave a comment or email your questions.
Finding the Right Air Pump
What brand and size of an air pump do you need? Alas, this is the million-dollar question. But, don’t freak out. This is not hard and you have plenty of good choices.
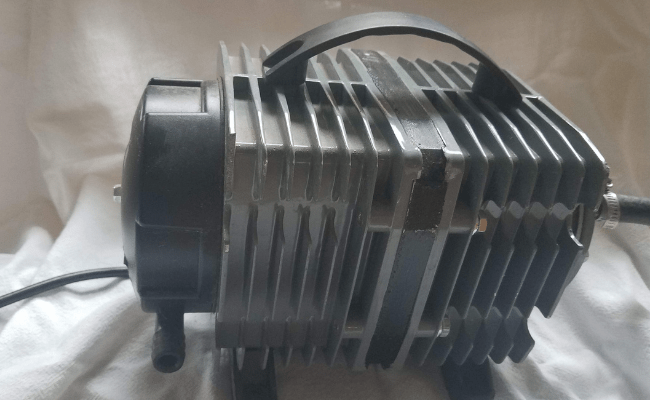
An air pump is going to last for years if you buy a quality unit. In fact, this happens to be fairly easy with air pumps. First of all, you will want to buy a commercial electromagnetic unit. They don’t cost much more and are built to last.
An air pump also needs to be the right size for your application. Most air pumps are rated by GPH (gallons per hour) or CFM (cubic feet per minute). Here again, size up when in doubt (within reason), because more airflow is a good thing.
Here are some ROUGH rules of thumb:
- 5-gallon brewing size – 600-1000 GPH
- 15-gallon brewing size – 900-1300 GPH
- 50-gallon brewing size – 1200-2000 GPH
Handy Calculator
For sizes over 50 gallons, you will want to use the following formula: .05-.08 CFM per gallon There is a handy calculator online that will help you convert GPH to CFM.
Example: We use an air pump that is rated at 1744 GPH. What size brews will that work on by the CFM calculation?
1744GPH = 3.89 CFM 3.89CFM/.05 = 77.8 gallons 3.89 CFM/.08 = 48.6 gallons
By this calculation, our air pump should work on brew sizes from 48.6 – 77.8 gallons
However, we have been making 25-gallon batches in a 32-gallon container for years with great results. This is just a rough rule of thumb. But, you do not want to be undersized. When in doubt, size up a little. Our pump does NOT work on 5-gallon batches. It blows all the contents out of the bucket. Use your commonsense when sizing.
You should be able to find a quality commercial electromagnetic air pump for $50-$80 in your size. These are not recommendations but some decent brands are Vivosun, Elemental, Eco-plus, and Hydro-farms. These can all be found on Amazon.
One last note: If you purchase a brewer, please follow the manufacturer’s recommendation for air pump sizing.
Compost Tea Recipes
Hey, who doesn’t like a good recipe? We wouldn’t recommend drinking this one but your plants will love it. Have you ever noticed that the best recipes are usually simple? The very same is true with compost tea recipes. Less is more.
Quality worm castings are the prime ingredient in good compost tea. The biology has to be in there for the tea to multiply it. We use Earthworm Naturals Worm Castings in our tea brews. These are our worm castings produced on our farm. We have extensively tested them and the microbes are in there. In fact, worm castings alone, with dechlorinated water will brew a very effective tea. In fact, everything else is just an additive.
Vitamin C Powder (Ascorbic Acid)
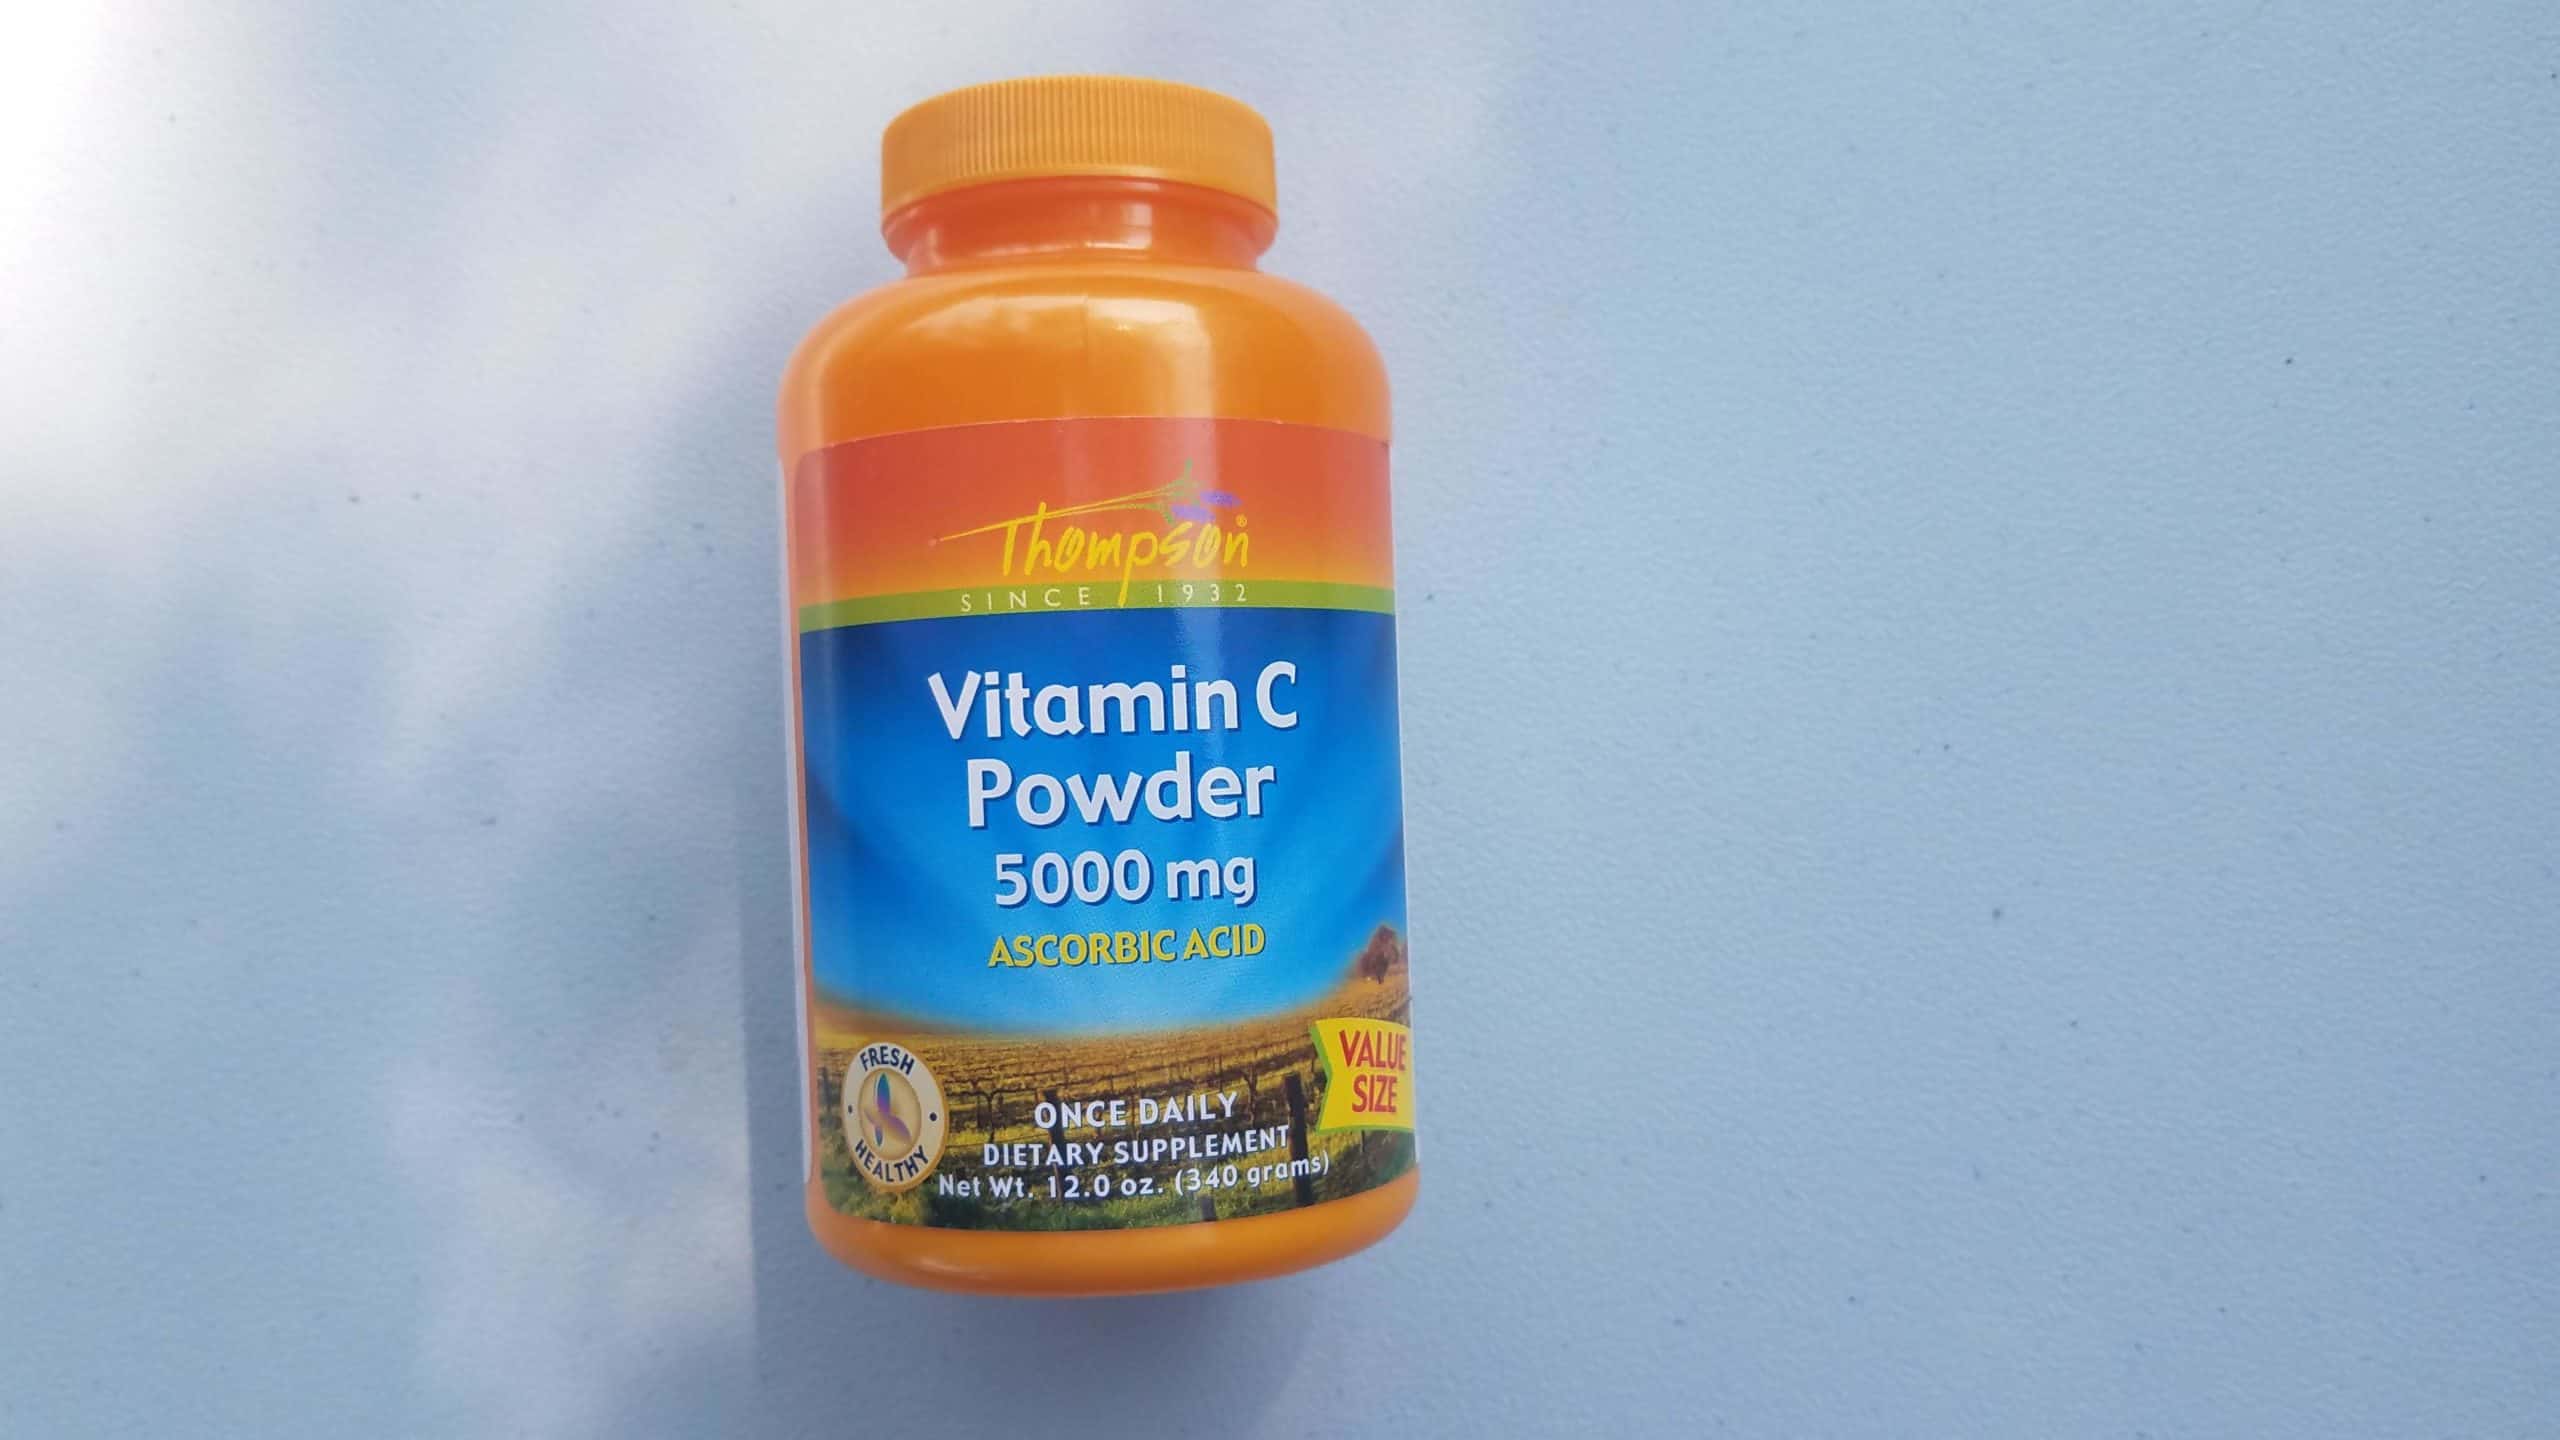
One very important note is the addition of Vitamin C powder (ascorbic acid) to the water before brewing. This is important because the chlorine or chloramines need to be neutralized. They were designed to kill bacteria in the water and they do a good job of that. We don’t want that chlorine to kill the bacteria in our tea.
You need to add 1/4 tsp. per 5 gallons of water. 1/2 tsp. will work on 25 gallons of water. Add the Vitamin C powder, stir, and wait at least 10 minutes before brewing. Done. Ready to brew.
All of our recipes are for 5-gallon brews. Use more ingredients for larger batches. For example, 2 cups of worm castings for 5 gallons = 10 cups for 25-gallons, and so forth. The ratios all stay the same.
Our Favorite Worm Casting Tea Recipe (5-gallon)
2 Cups – Quality worm castings
1 Cup – Spaghnum peat moss
3 TBSP. – Azomite or glacial rock dust (micronized)
1 TBSP. – Kelp meal
2 TBSP. – Unsulphered Blackstrap molasses (optional)
Directions:
Add 1/4 tsp of Vitamin C powder to the water in your brewer. Start your brewer bubbling. Stir and wait at least 10 minutes before proceeding. Add all the ingredients except for the molasses to your brewer. After the ingredients are well mixed by your brewer, add the molasses and stir. Brew for a minimum of 24 hours and no longer than 72 hours. 48 hours seems to be the “Sweet Spot”. Apply full-strength or diluted up to a 10-1 ratio. If diluting the tea, be sure to use dechlorinated water. That could be either rainwater or by using a chlorine filter on your hose.
Notes:
The peat moss is added as a cheap way to add fungal material to the tea. The Azomite and kelp meal will feed the bacteria and fungi. They also give the microbes something to attach to. The unsulphered blackstrap molasses is a sugar source for the bacteria to feed on. There is some controversy about using a sugar source in compost tea. The molasses is optional but we use it. However, you don’t have to if it bothers you. Your tea will be great either way.
Growth Tea Recipe (5-Gallons)
2 Cups – Worm castings
4 oz. liquid or 2 oz. powdered – fish hydrolysate (stinks like dead fish)
1/4 Cup – Alfalfa meal
1 TBSP. – Bat guano
3 TBSP. – Azomite
Directions:
Add 1/4 tsp of Vitamin C powder to the water in your brewer. Start your brewer bubbling. Stir and wait at least 10 minutes before proceeding. Add all the ingredients to your brewer. Brew for a minimum of 24 hours and no longer than 72 hours. 48 hours seems to be the “Sweet Spot”. Apply full-strength or diluted up to a 5-1 ratio. If diluting the tea, be sure to use dechlorinated water. That could be either rainwater or by using a chlorine filter on your hose.
Notes:
We prefer to use this compost tea full-strength as a root drench on individual plants. However, the tea can be diluted and sprayed with dechlorinated water as a foliar treatment also.
Compost Tea Filtering
There are a couple of different ways to add your ingredients to compost tea. You can just dump them in as we do. Or, you can add the ingredients to a mesh bag, and hang it in the brewer. Both ways work.
Some brewers are designed to be used with mesh bags. In fact, these brewers usually have aeration pipes going into the bags for better efficiency. There is no need to filter these brews before using them.
However, airlift brewers like we use, are designed for the suspended materials to be agitated through the entire cycle of brewing. These tea brews need to be filtered before using them. Otherwise, they will clog up any spray equipment used to apply them.
Filtering is an easy process of utilizing a 5-gallon paint filter in a bucket. The tea is dipped out of the brewer and poured into another bucket with the paint filter in it. The filter is lifted out and “Voila” your tea is filtered. Actually, this a quick and easy process. The tea can then be applied with whatever equipment you choose to use.
Compost Tea Application
There are many ways to apply worm casting tea. Some examples include a simple cup or bucket, watering can, or a hose-end sprayer. However, there is some equipment you should avoid using.
Pressurized spray equipment with small spray nozzles should be avoided. Handheld spray bottles should also be avoided. In fact, handheld spray bottles seem to be especially detrimental to the microbes in your tea.
Research has shown that small nozzles on pressurized spray equipment can adversely affect fungi especially. However, it seems to be on a case by case basis. It depends on your brew and your unique equipment. A microscope is needed to check the tea before and after spraying to be sure.
Pumps seem to be okay and many people drop trash pumps into their brewers to spray their tea. They will use a garden hose and spray their tea full-strength. In fact, this is a very viable option.
We made a Youtube video showing the process of filtering and the application of worm tea. There are examples of applying a root drench, using a watering can, and also the use of a hose-end sprayer. The video finishes up by showing a gravity-fed lawn applicator for applying compost tea. Take a look.
Conclusion
Wow, it has been quite the ride! If you made it this far, it is because you want to know about compost tea. Congrats!! Compost tea or worm casting tea is not a magical process. It is fairly easy to make and a very good value for your money.
Compost tea should be in every organic gardener’s arsenal. It is an easy way to supercharge your garden and has a minimal cost. A little equipment and knowledge are all that’s needed to be successful with your brews.
Hopefully. you have gleaned enough knowledge from this article to start brewing your own compost tea. Good luck and happy gardening!


Thank you for your detail. I’ve been making small non-aerated batches/extracts of worm tea but am looking to move up in the world! This is so helpful. I do have a couple questions. 1) Can the tea be stored at all or should it be used immediately? I’ve heard both and know I’ve seen it sold online but I don’t understand all the biology of it all honestly. 2) Do you think a “pickle bucket” from a local restaurant would be fine to brew in? It’s definitely food grade but smells very pickle-y which I can’t make go away. I use them as in-ground worm towers and they still smell after a year. Do you see any harm to use them for brewing? Thanks so much for your expertise
Worm tea should be used within 24 hours and immediately is best. Otherwise, the bacteria will use up all of the oxygen and begin to die off. A pickle bucket will work just fine. No problems. If you check out Iowa Worm Composting on YouTube, there are some videos about brewing worm tea. Thanks for stopping by.