Making worm tea at home is a simple process that requires some very basic equipment.+
It does require some time and a little patience to do it correctly.
We are going to show you step by step instructions on how to make worm tea at home.
Then will show you the equipment needed, a basic recipe, and explain the brewing process.
We will also give you some tips on ingredients that can improve your basic worm tea recipe.
Most importantly, we will also show you what NOT to do when making and using your worm tea.
Our Shopping Experiment
We knew that we were going to share a blog post about making worm tea at home.
We decided that we would go to our local Walmart and see if we could purchase everything we needed.
Then we discover what the current prices and availability of the needed products were.
This was a little shopping experiment.
We are happy to report that it was a one-stop shopping trip and everything we needed was purchased for about 20 bucks.
Not too bad. Let’s take a look at what we bought.
The Basic Equipment
We purchased the following items:
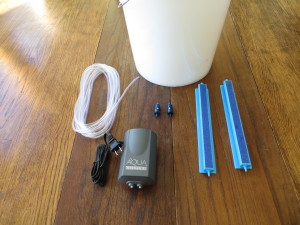
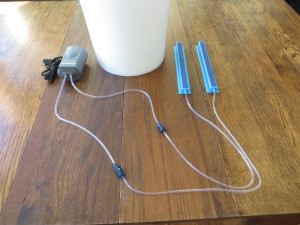
Dbl outlet aquarium pump with 2 check valves (1)
Aquarium air hose (25 ft)
10-inch air stones (2)
5 gallon (food grade) plastic bucket (1)
The total cost was right around twenty dollars. $20.43 to be exact including 7% sales tax.
We now have all the equipment required to start making worm tea at home.
Worm Tea Recipe Ingredients
We also need some ingredients to make our worm tea. They are simple but very important.
The first ingredient is water:
Rainwater or pond water is best BUT it is winter in Iowa where we live and all those water sources are a little HARD.
Think ice and snow.
We used un-softened tap water. Our water is chlorinated so an extra step is required.
We simply let the water sit in the bucket for a couple of days to gas-off the chlorine.
Chlorine would kill the bacteria that we are trying to grow. That is its main purpose.
Fortunately, it gasses-off quickly when exposed to air.
Please don’t skip this step if you have to use tap water. Your results will be less than stellar if you do.
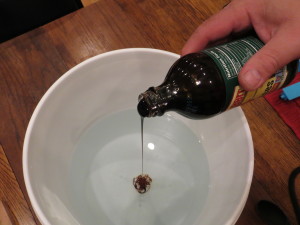
The second ingredient is molasses: You can find this at any grocery store. You want the un-sulfured molasses.
This is sometimes referred to as blackstrap molasses. Very easy to find. You will add one to three ounces per bucketful.
No need to measure. Just eyeball it. This provides the sugar source for the bacteria to grow.
The bacteria will use what it needs.
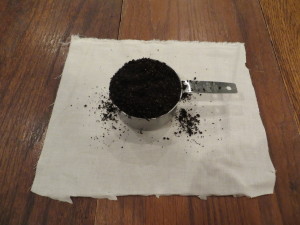
The third ingredient is some worm castings: We use a general rule of thumb measurement.
One ounce of worm castings per gallon of water. 3 ounces of castings is about a cup so don’t run out and buy a scale.
A cup measurement is close enough.
These are all the ingredients that you will need to make your compost tea.
This will brew a very effective tea solution that your plants will love.
Worm Tea Supplies
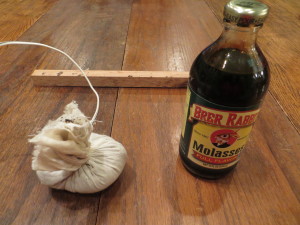
There are also a few supplies. We need something to put the worm castings into. Think teabag.
You will need an old nylon stocking, piece of cotton material, an old thin cotton sock, or something on that order.
We used a small piece of muslin material. Cheesecloth might be a little too porous.
You will likely get some worm castings in your bucket.
That doesn’t hurt anything but may clog up your watering can when using your tea.
If you get some worm castings in your tea … you can strain the finished tea through a paint filter or a piece of cloth to remove the debris.
You will also need some string or a cable tie to close your tea bag.
A piece of wire would also work. Use whatever is most convenient.
A small board that spans the top of the bucket is also useful. You can tie your teabag off of this to suspend in the bucket.
Alternatively, you can tie off to the handle on the bucket and accomplish the same thing. That is it. Let’s start brewing.
Making Worm Tea at Home
We need to put our equipment together that we purchased. The tubing is connected to the air pump.
We then connect the other ends to the air stones.
If your pump came with check valves, you will want to install these between the pump and the air stones.
This keeps water from siphoning back into your pump.
If you do not have check valves, make sure that the pump is located at a higher level than the water in the bucket.
This will prevent siphoning.
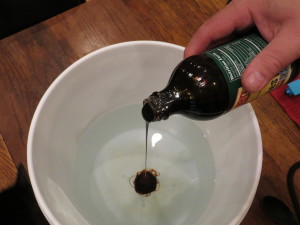
Add your molasses to the bucket and give it a good stir to mix.
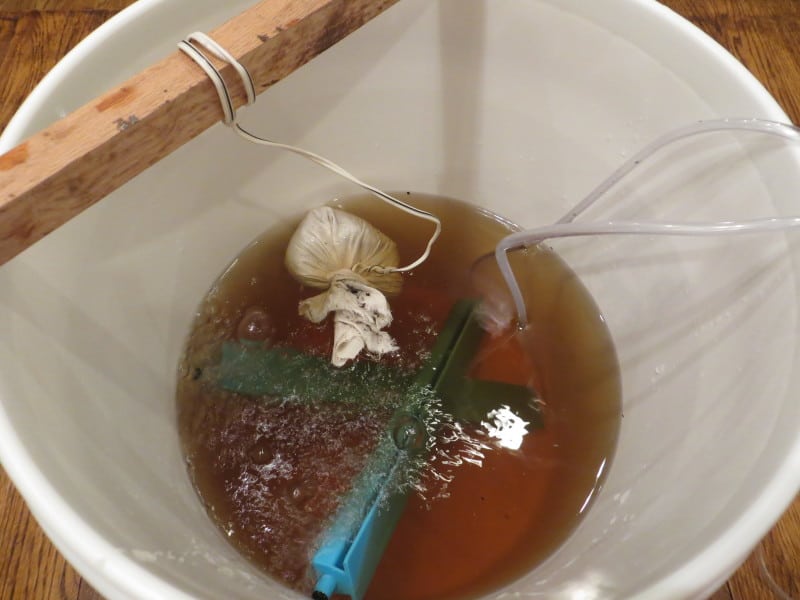
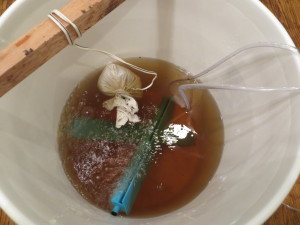
Your air stones can now be placed in the bucket and you can hang your teabag in the bucket.
Make sure that your teabag is suspended in the bucket and not sitting on the bottom.
Plug your pump in and you are brewing your first batch of worm tea.
Brewing Worm Castings Tea
We like to brew our tea for about 24 hours. You can go longer but not shorter. The bacteria need time to grow.
This is a good time to talk about the water temperature.
The ideal temperature is 80-90 degrees F. Room temperature (70) F is okay but you will want to brew a little longer.
The bacteria will reproduce more slowly. DON’T try with very cold water. Results will be dismal at best.
You could always heat your water on the stove to 90 F and start brewing.
This would give your bacteria a head start. We don’t do this. We just start at room temperature and brew for 24-36 hours.
That is all there is to it. Just set your bucket in a corner somewhere and let it percolate.
You can brew longer but you may need to add more molasses to feed the active bacteria colony.
Just be aware of this if the need arises.
Optional Ingredients for Worm Tea
There are also some optional ingredients that can be added to boost your homemade worm tea brew.
These are not absolutely necessary but can add some diversity to your brew.
You can add any or all but start with small doses of each. These would include:
Liquid Kelp or Seaweed – Good for fungi growth
Fish Emulsion – Good nitrogen source
Alfalfa Pellets – Good nitrogen source
Seabird Guano – Bacterial diversity
Humic Acid – Unlocks nutrients
Rock Dust – Mineral content (Very fine)
This is by no means a comprehensive list but rather a starting point for you to experiment with.
Conclusion
We have covered the basic equipment needed, the cost, recipe, supplies, and the actual brewing process.
We also gave you some ideas for some optional ingredients to help in making worm tea at home.
One other important point is in the usage of your tea.
This is a product with a short shelf life. You will want to use your worm tea within 24 hours.
The application should NOT be with a pressurized sprayer ( can kill your bacteria).
A watering can or a turkey baster for small plants is a better choice.
Dilution is fine. The same water rules apply. Your worm tea can be diluted up to a 10 – 1 ratio with rain or pond water.
Tap water is also okay if you de-gas the chlorine first. Full strength or anywhere in between is also okay.
We hope this helps you with making worm tea at home.
You will enjoy the results worm casting tea has on your plants and gardens.





I really enjoy your contributions. I have only been worming for a year and have much to learn. Thanks from Downunder. Don
You are most welcome. Thanks for visiting.
Is there a benefit adding epsom salt and instant tea to the recipe?
Thank you kindly
I would think no to the epsom salt. It may interfere with bacteria growth. The tea would probably be okay but I do not think it would have a great benefit. The epsom salt and tea would be better used as a direct application in your garden. Thanks for visiting.